How to Do Microdermabrasion At Home
 As I get older, I am constantly searching for the latest and greatest in skincare. I’m always game to try out new skincare products, but I can be a bit hesitant when it comes to pricey skincare treatments at the spa. During my last spa facial, my aesthetician had recommended that I try microdermabrasion to exfoliate my skin and help reduce some of my skin’s discoloration, but I was worried that my skin wasn’t “bad enough” to warrant the hefty price tag of the spa service. While I kept the idea of microdermabrasion in the back of my mind, I simply went home and continued on with my normal skincare routine.
 Over the next few months, I noticed that despite my high-maintenance skincare routine, I still had dry and flaky patches of dead skin and light acne scars that wouldn’t go away. I think the universe could hear my inner monologue that was attempting to justify expensive microdermabrasion treatments because a few days later, I received an offer to test out the Silk’N Revit. It’s an at-home microdermabrasion device that’s taken my skincare routine to a completely different level. If you’re interested in microdermabrasion but aren’t ready to pay spa prices, keep reading to learn how to do microdermabrasion at home!
 Before we get started, let me state the obvious. You’re going to need to purchase an at-home microdermabrasion tool. While exfoliating scrubs and polishes can slough away dead skin, there’s really nothing like a microdermabrasion tool. For today’s tutorial, I’m using the Silk’N Revit, and I am completely satisfied with its features and effectiveness. This device combines diamond microdermabrasion technology with vacuum stimulation to exfoliate the skin and reduce the appearance of scars, wrinkles, age spots, fine lines, and acne scars. It costs less than a normal microdermabrasion service at the spa, so in my opinion, it’s a fantastic value.
 So how does it work? The Silk’n Revit removes excess dead skin cells and then vaccuuming them into the device. It was designed by a team of scients who create aesthetic devices for dermatologists and plastic surgeons, so the technology is top notch.
Step 1: Cleanse Your Face
Before starting your microdermabrasion treatment, it’s important to thoroughly wash your face with a gentle cleanser. After removing excess dirt, oil, and product residue with cleanser and water, allow your skin to dry completely.Step 2: Prep Your Microdermabrasion Tool
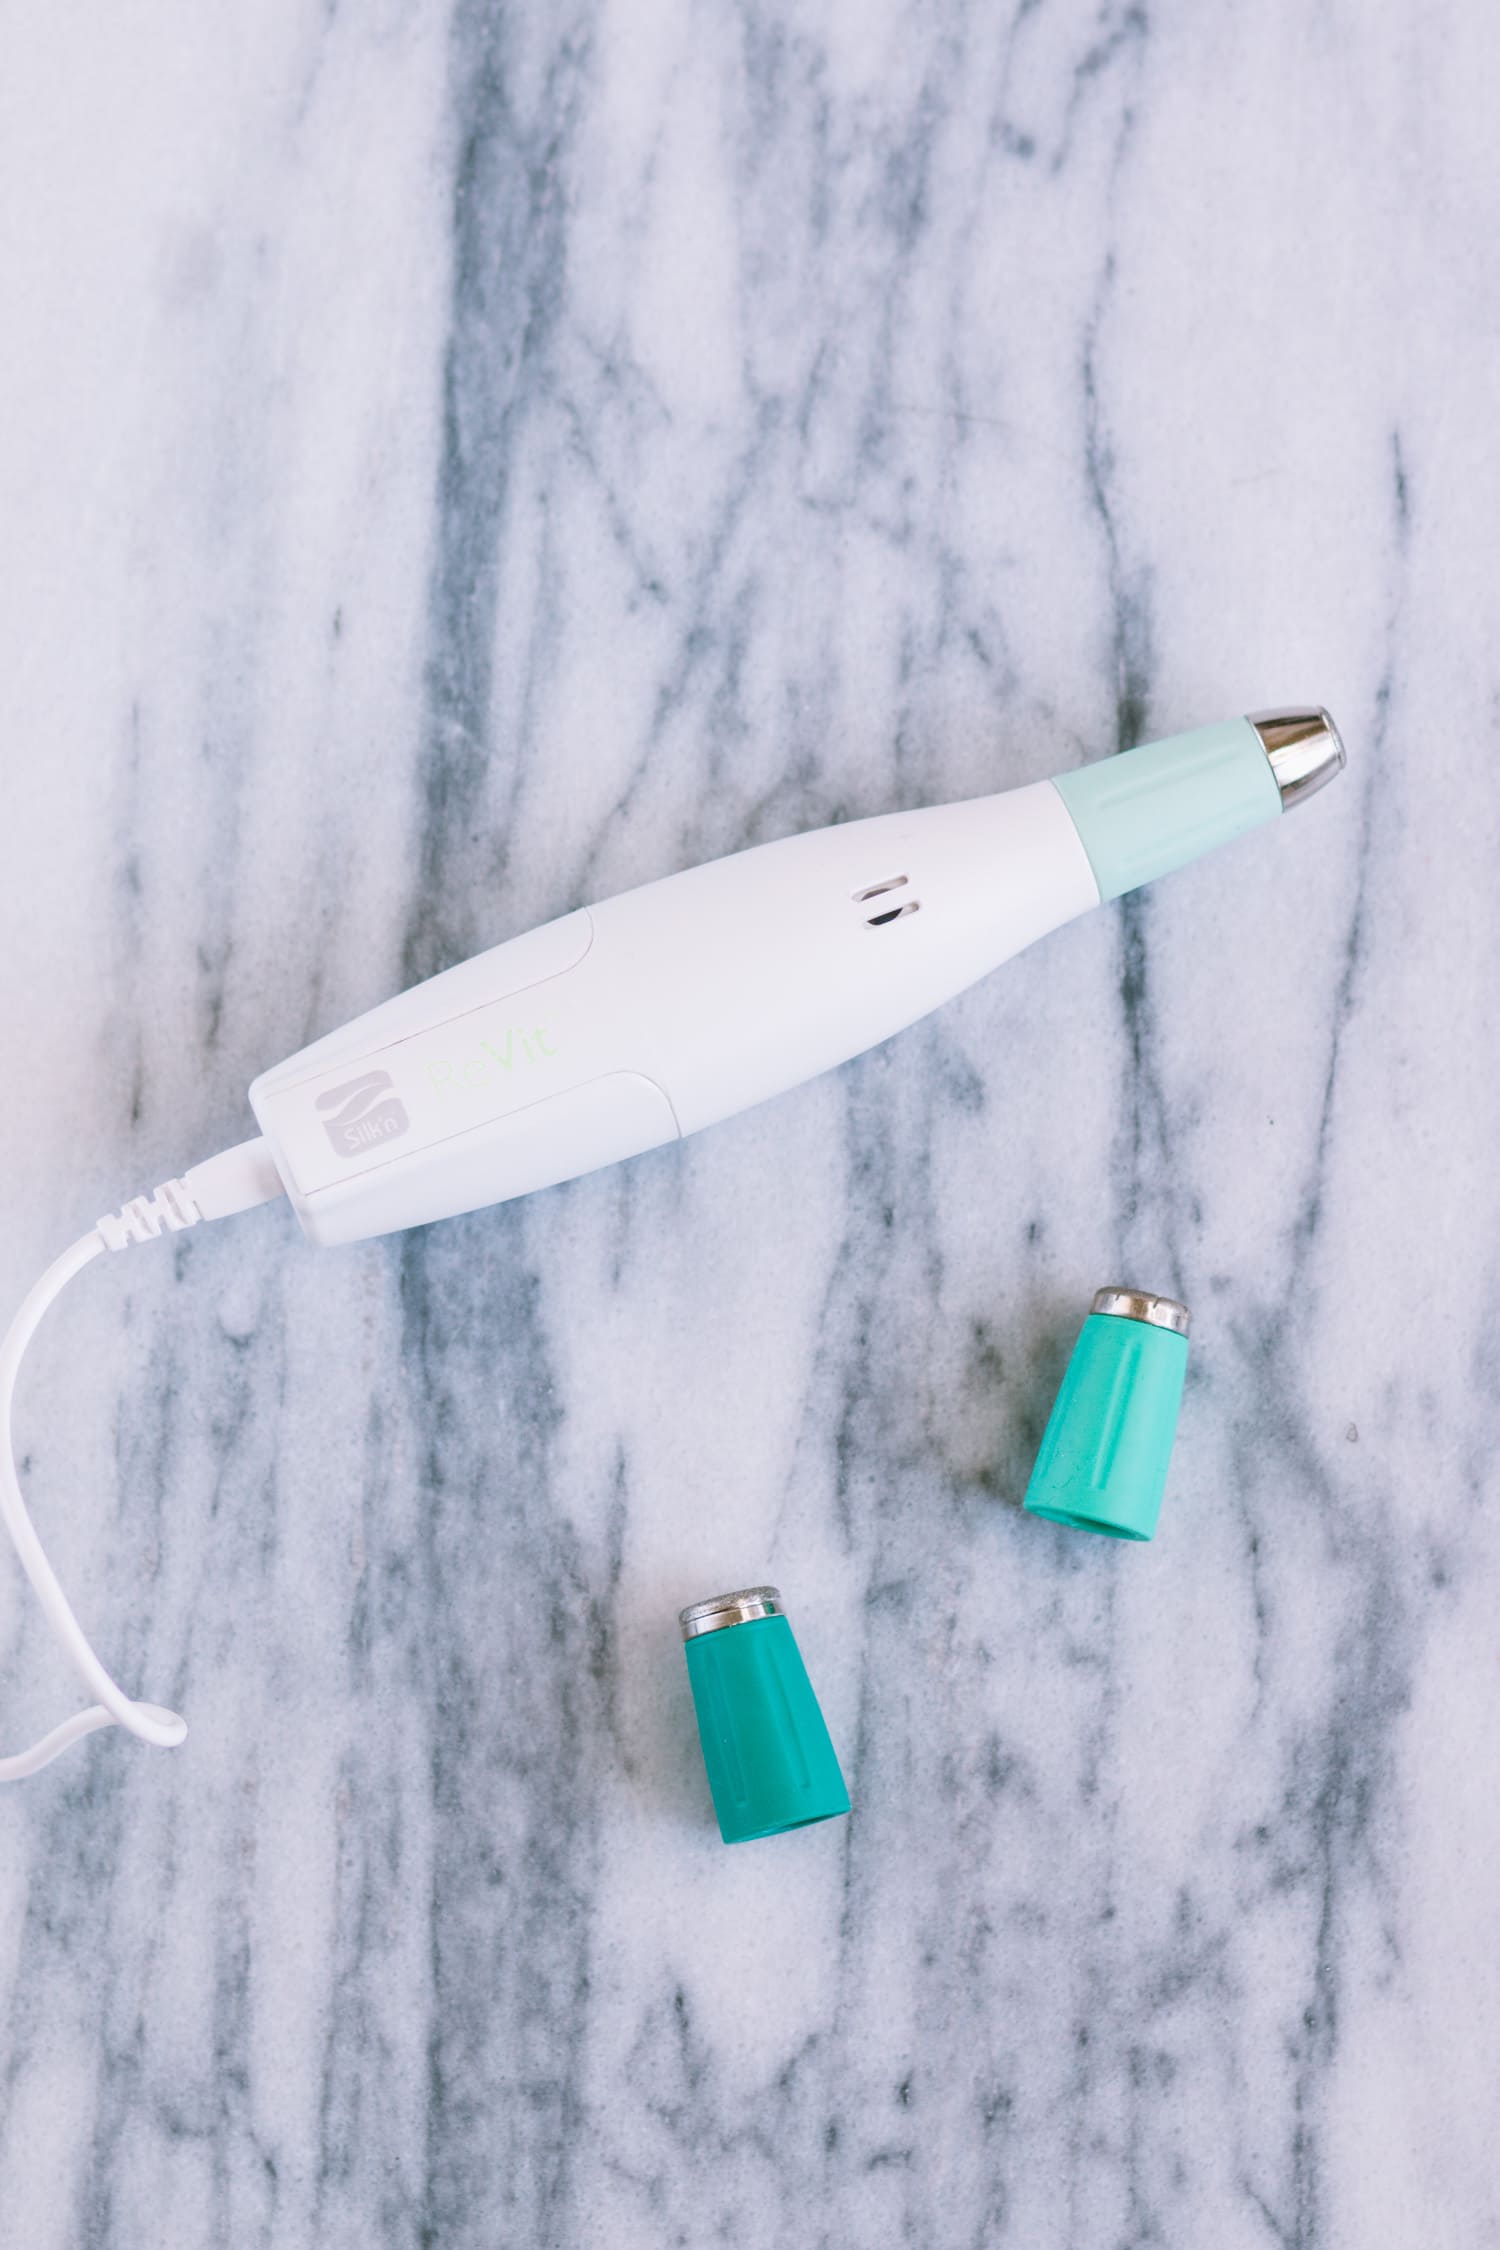 Before starting the procedure, you’ll want to prep your microdermabrasion tool by choosing the appropriate tip and peeling intensity setting. The Silk’n Revit has two suction settings that provide light or normal vacuum suction to exfoliate your skin. If you have sensitive skin, I’d recommend starting with the lowest setting to begin with and slowly progress to the higher setting after your skin has acclimated after a few treatments.
  You’ll also need to select a microdermabrasion tip. The Silk’n Revit comes with three diamond microdermabrasion tips to use based on your needs. The coarse tip (dark green) is best for covering large areas quickly and provides the highest amount of exfoliation. The fine tip (mid-toned green) is slightly smaller and provides a lighter amount of exfoliation. The precision tip (light green) is best for small areas like above your lip, below your nose, and around your eyebrows.
 Step 3: Start Microdermabrasion Treatment
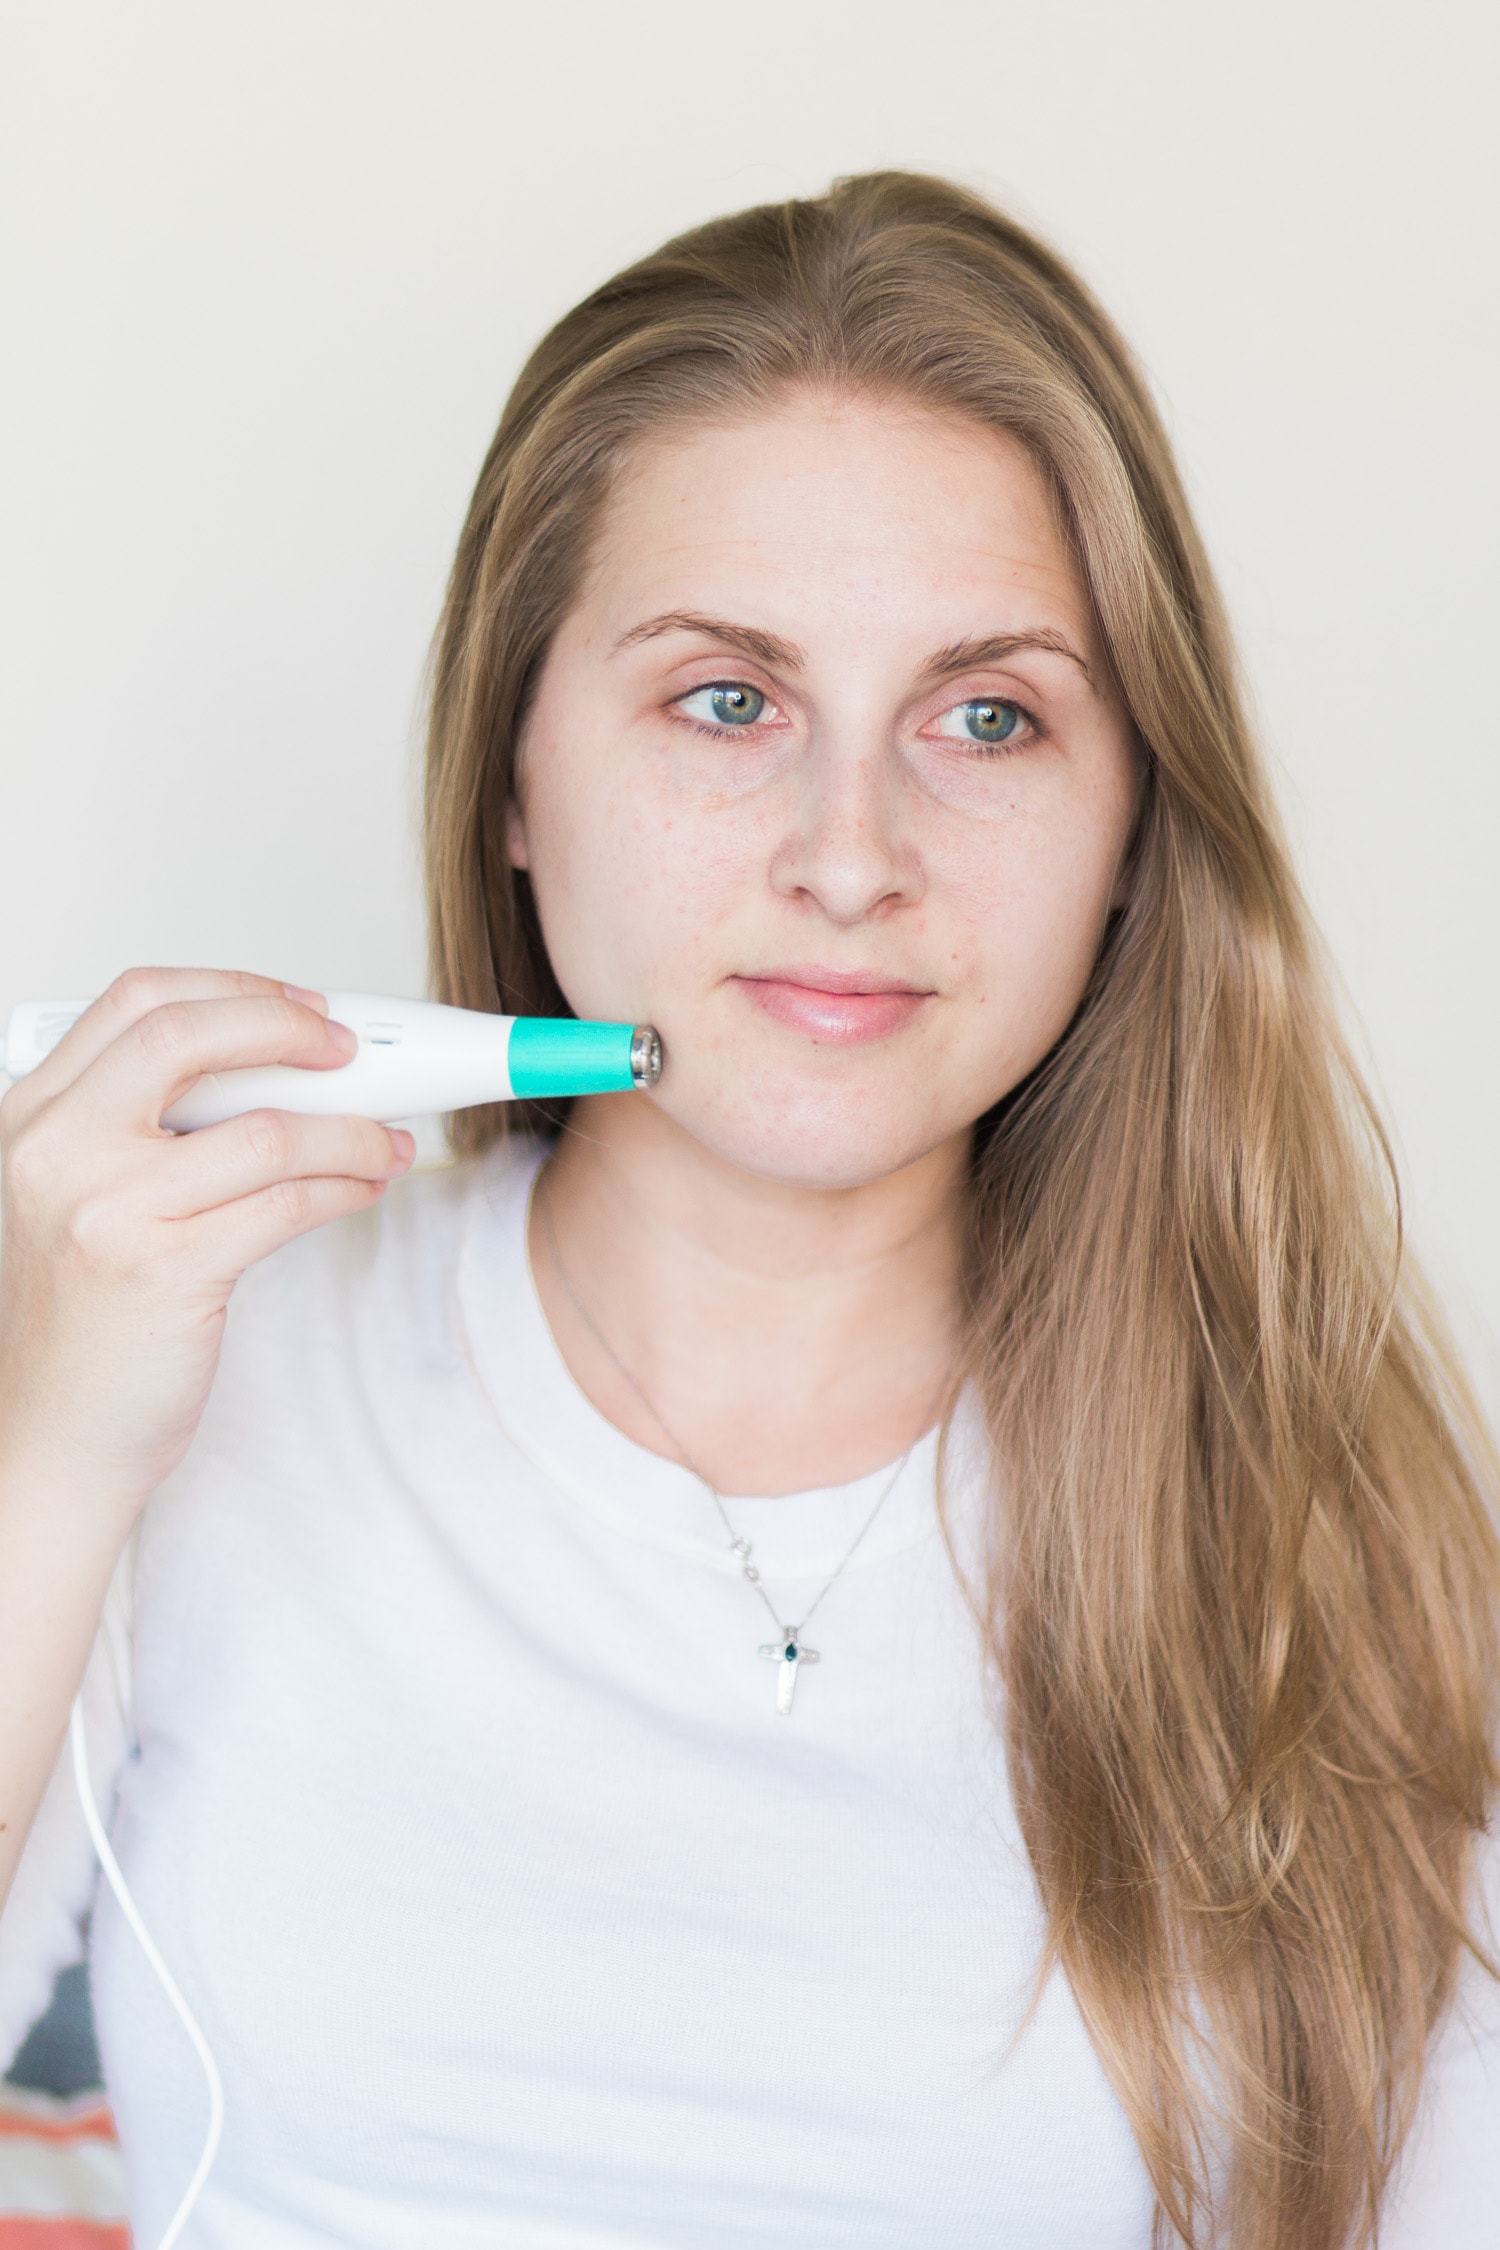
 And now onto the fun part: the microdermabrasion treatment. You’ll want to hold your microdermabasion tool like a pencil, press the tip flat on your skin, and smoothly glide it across your face. If the tip isn’t lying flat on your skin, the vaccuum won’t suction properly. You’ll notice a light tug of suction on your skin, but I ensure you that it is not painful at all.
 You want the microdermasion device to be constantly moving, and it’s best to work in small sections. Here is a handy chart showcasing the directions you should move the tool on each section of your face:
Cheeks and Chin Area: Start at the middle of your face and slowly move sideways towards the outer edge of your face. After completing one line, move the device down from where originally started and repeat until the entire area has been exfoliated.
Lip Area: I recommend using the precision tip for this area of the face. Start at the middle of your face and move outwards towards the edge of your face. Please be careful not to let the diamond microdermabrasion tip touch your lips.
Eye Area: Be very careful around this area because the skin is extremely delicate. Use the microdermabrasion device downward from your temples down to your eyes and at the edge of your eyebrows towards to the outer edge of your face directly above your ears.
Forehead: Start at the middle of your forehead and move towards the outer edge of your face. Do one side of your forehead at a time.
Nose: Stroke down the bridge of the nose and then outwards from the bridge of the nose down the side of your nose.
Hands: You can also gently exfoliate the back of your hands and the top of your fingers by using the fine tip from the Silk’n Revit.
After completing the microdermabrasion treatment on your skin, you’ll notice dead skin particles on the device. Simply remove the diamond tip, take out the filter, dust off any dead skin particles, and put in a replacement filter to prep your microdermabrasion tool for the next treatment.
Step 4: Rinse or Gently Cleanse Your Face
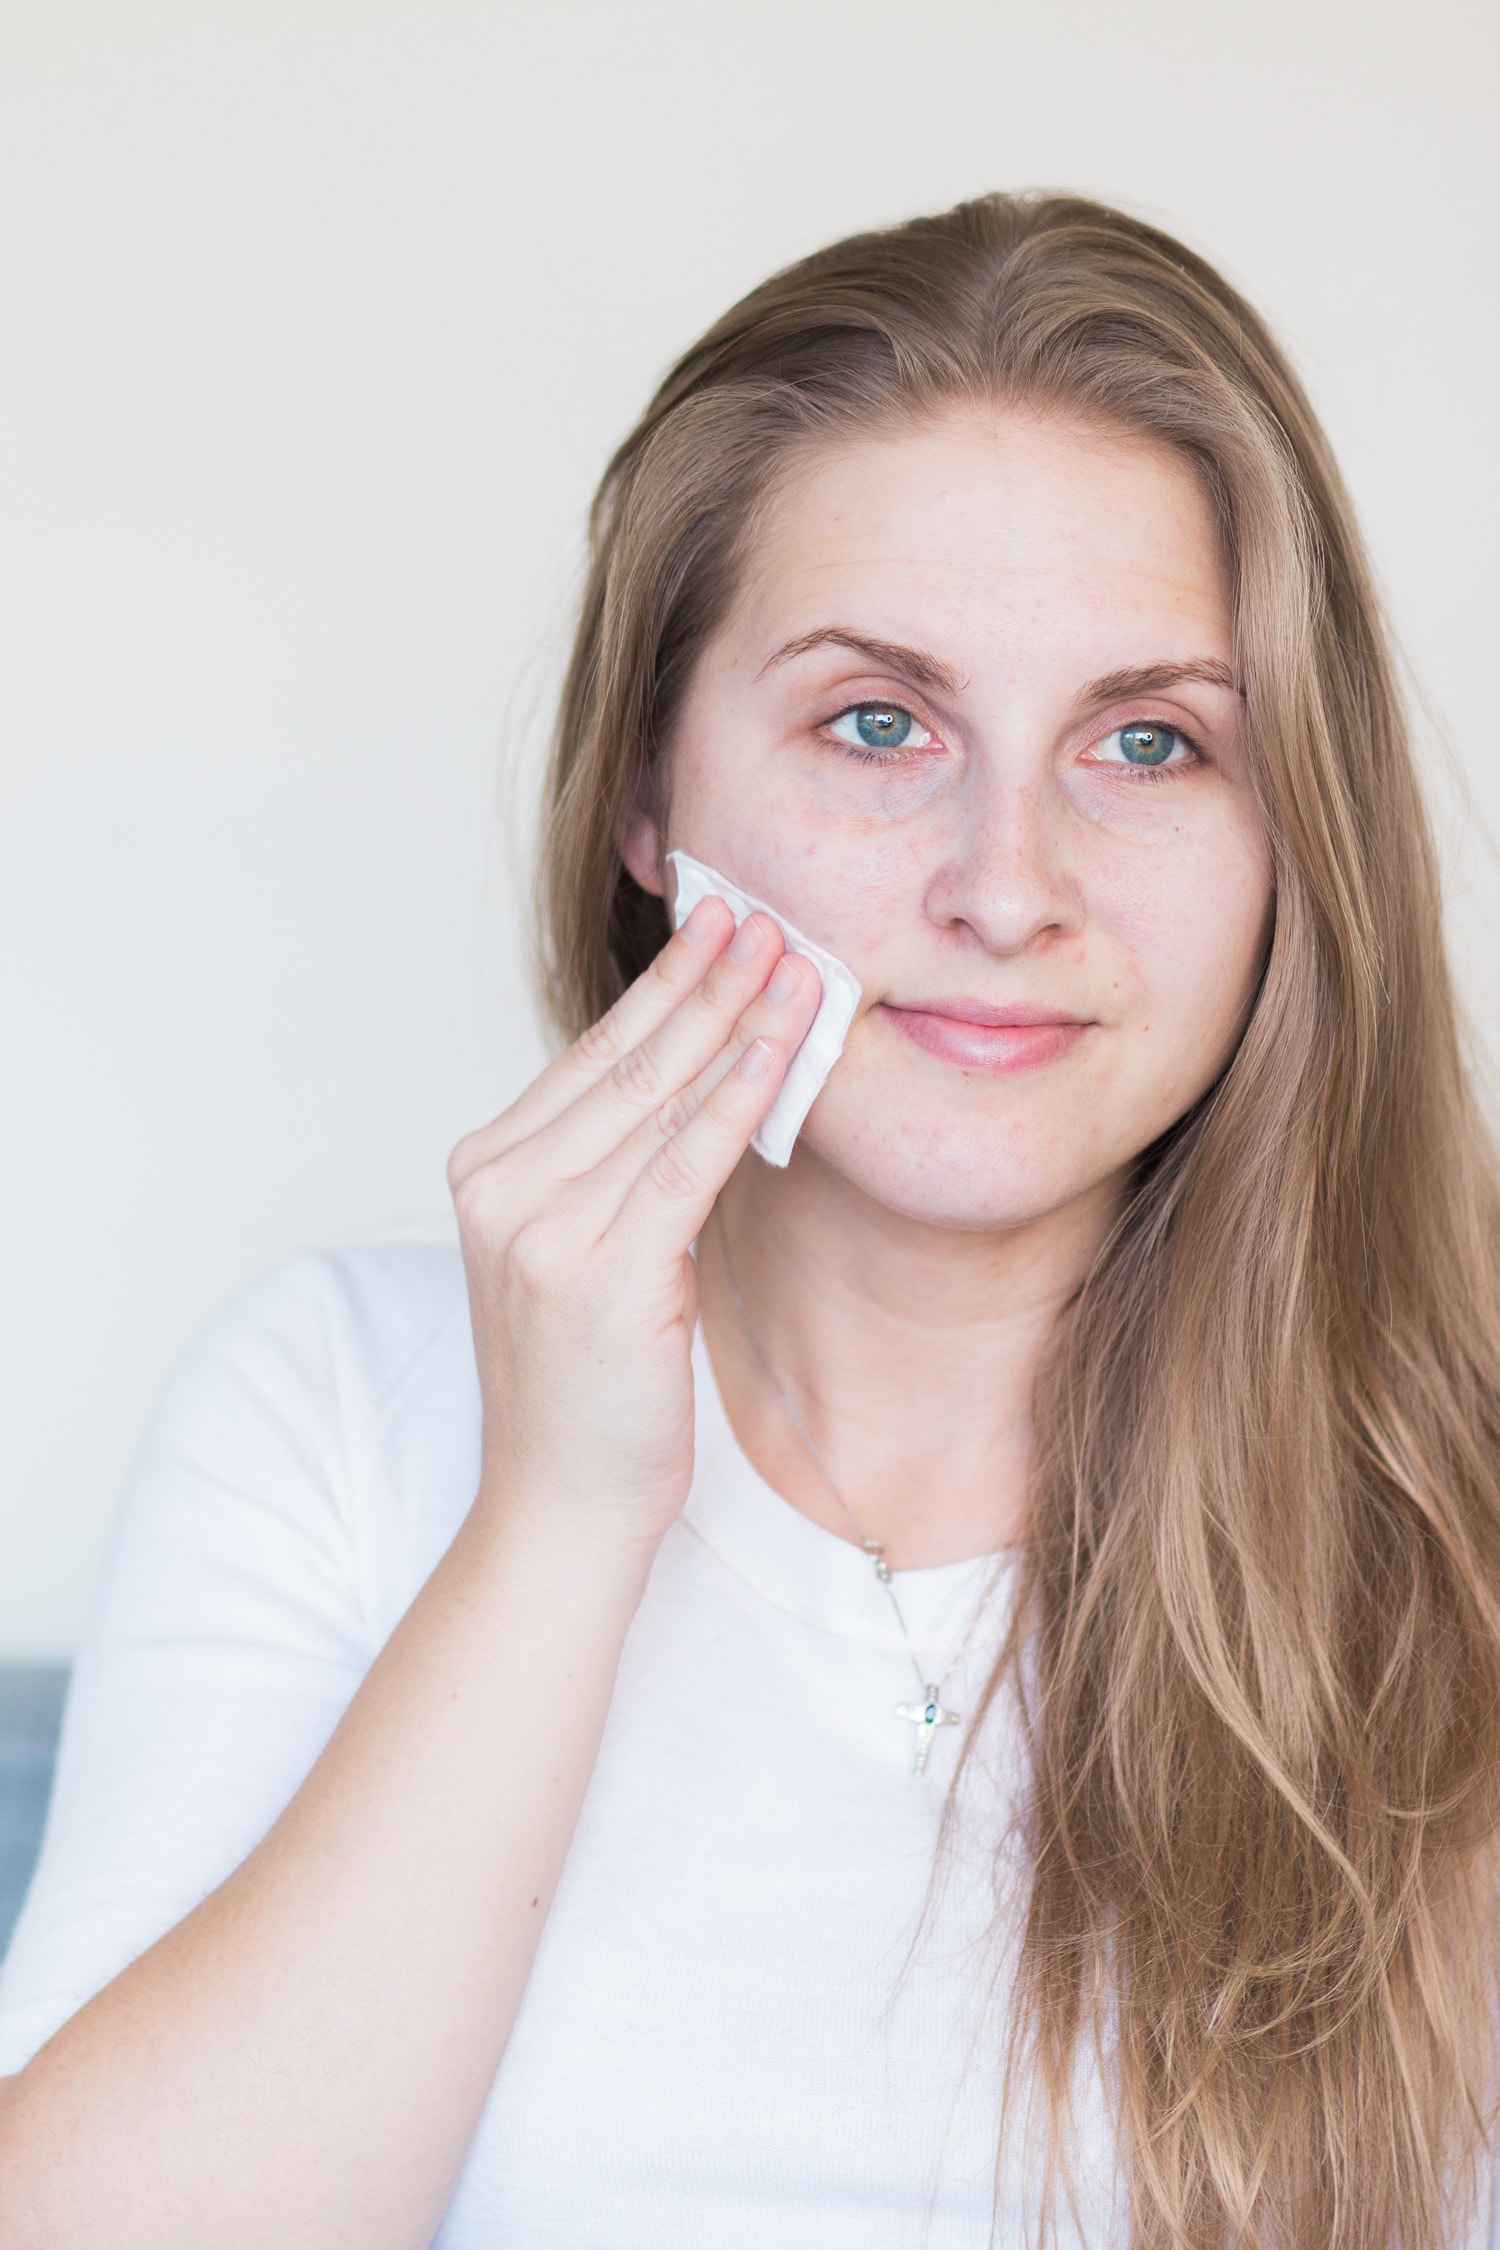 After finishing your treatment, you’ll want to gently cleanse your face to remove any remaining dead skin particles. You can splash your face with water or use a micellar water for this step, but please avoid using any harsh cleansers. Your skin may be slightly irritated from the microdermabrasion treatment, so you don’t want to cause extra inflammation.
Step 5: Apply A Rich Moisturizer
 As you can see in this photo, my skin becomes slightly red and irritated after my at-home microdermabrasion treatment. While this light redness goes away quickly, I like to soothe my freshly exfoliated skin with a calming serum and a thick moisturizer. If you’re headed outdoors, I’d highly recommend using a moisturizer containing SPF to protect your skin.
 So now you know exactly how to do microdermabrasion at home! In 10-15 minutes, you can complete an at-home microdermabrasion treatment that will help you uncover healthier skin naturally. After completing the treatment, your skin will feel insanely smooth and soft. I’m currently doing at-home microdermabrasion once a week, but it can be used up to every 3 to 4 days depending on your skin type. While I love the instant smoothness and improvement in skin texture, I can’t wait to update you on its effects on acne scarring and discoloration.
 If you’re in the market for a microdermabrasion tool, I highly suggest the Silk’n Redit. It’s easy to use, effective, and less than the cost of one traditional microdermabrasion treatment. It’s available for purchase at Bed, Bath & Beyond, Kohl’s, Ulta, and select Target locations.