Easy Side Braid Tutorial

Let’s just say that hair styling is not one of my talents. I’ve learned how to curl my hair properly through years of trial and error, and I can knock out a ballet bun like nobody’s business. But fancy braids? No, nope, no way. For years I would try to copy the intricate braid designs I saw on Pinterest and in magazines, and I’d fail miserably each and every time. My attempts at braiding were completely pathetic, and I always ended up looking like my hair was tangled into a giant knot. If you can relate to my braiding failures, then this tutorial is for you! I created it specifically for girls like me who want to wear a relaxed, boho braid even if they have zero talent for styling hair – AKA girls like me. This three step tutorial is basically fool-proof, so get ready to create a beautiful and romantic side braid in only a few minutes!
Prep Your Hair
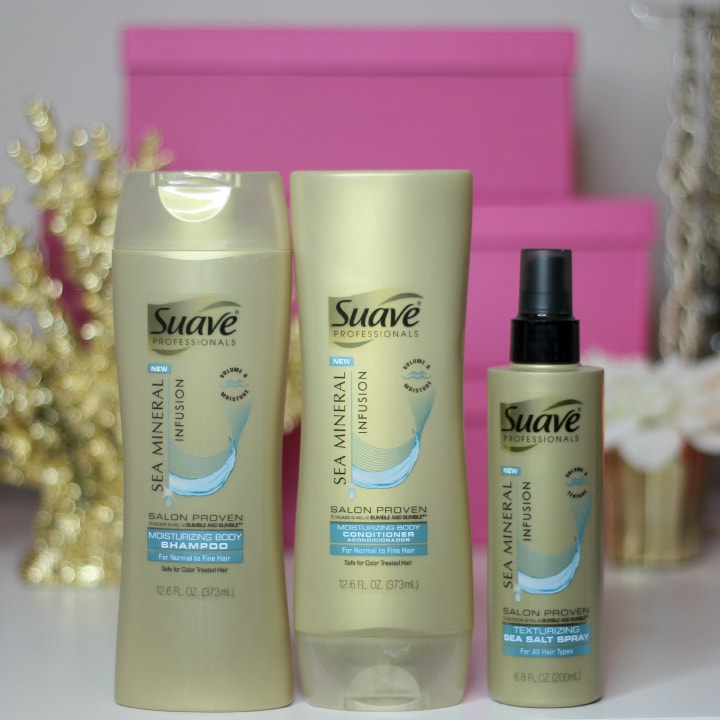
If your hair has too much slip from styling products, your braid is going to fall out of place in seconds. The best braids always start with smooth and voluminous hair that has just the right amount of grip to hold the style. To get the best results, use a moisturizing body shampoo and conditioner that will add volume to your hair without leaving it dry or frizzy. The Suave Professionals Sea Mineral Infusion Moisturizing Body Shampoo and Conditioner is my favorite shampoo for the summer because it smells exactly like a day at the beach, and it gives my hair the perfect texture for braids. Once my hair is about 75% dry, I spray the Suave Professionals Sea Mineral Infusion Texturizing Sea Salt Spray from root to tip. This sea salt spray adds just the right amount of grit to your hair to keep your braids in place all day long, and it will also help your hair hold a wave from the braid once you take it down!
Step 1: Twist

Once your hair is perfectly prepped, it’s time to start braiding! The goal of the first step is to create a faux French braid effect that doesn’t actually involve any braiding. I always mess up French braids, but I love the look of a braid that starts from the top of your head. It’s easy to mimic the look by twisting your hair instead of braiding, and it’s incredibly quick and easy! Simply create a side part in your hair and take a 2 inch section of hair from the side of the part with the most hair. You’ll want to take hair that’s aligned with the top of your forehead to get the best results. Simply twist the hair around itself 1-2x, and take a small piece of hair from lower down and wrap it into the twist. We’re basically using the same technique as a simple French braid, but we’re twisting instead of braiding. Once your twist reaches your ear, simply twist the two pieces all the way down and secure with a clear elastic!
Step 2: Braid

Now it’s time to create the rest of the braid! Sweep the remainder of your hair to the same side as your twist and move the twist in front your hair. Separate your hair into three sections and add the twist into the front or middle section. Once your sections are all set, simply complete a traditional braid and finish with a clear elastic. If any short pieces of hair from the back of your head start to fall down during this process, simply secure it with a bobby pin. Since we created the twist at the top of our head, it appears that the braid goes all the way down!
Step 3: Fluff

I’m a fan of chunky, thick braids! The bigger, the better. To create a thick and messy braid, gently pull apart the braid with your hands to fluff it up. Your braid will instantly double in size, and it will take on a relaxed, boho vibe! The finished look is the definition of summertime beauty, and your friends will be blown away with your braiding skills. Warning: you might get an overwhelming amount of compliments when you wear this look, so be prepared to smile a lot throughout the day!
Whether you want to rock the perfect side braid or bouncy beach waves, the Suave Professionals Sea Mineral Infusion line is your best bet for creating perfect summer hair. It works just as well as fancy (aka overpriced) salon brands, and it smells like the perfect beach day. Plus, you can find the entire line at Walmart for under $5!
If you re-create this look from this easy side braid tutorial, please tag me (@ashleybrookenicholas on Instagram or @ashleybrooke71 on Twitter) in the picture and use the hashtag #StyleItYourself. I can’t wait to see your awesome side braids!
PIN THIS POST:
Click here to pin this post, so that you can get the perfect side braid every time!

Discover the Beauty of the Sea with NEW Suave Professionals® Sea Mineral Infusion products.
This is a sponsored conversation written by me on behalf of Suave Professionals® . The opinions and text are all mine.