3 Days of Great Hair: Easy Fall Hairstyles
Thanks to Target for sponsoring today’s post.
There’s nothing better than a good hair day. As a teenager, I’d get up every morning at 5:00 a.m. to wash, blow dry, and straighten my hair. I wanted to look perfect for school, and I sacrificed my sleep and the health of my hair in order to create the perfect hair each and every day. Flash forward to the present year, and things couldn’t be more different. I only wash my hair every three or four days, and I spend about five to 15 minutes styling my hair each day. And guess what? My hair looks way better than it did in high school despite the fact that I spend about 90% less time styling it. I have absolutely zero natural talent or patience when it comes to styling hair, so I’ve developed a three-day routine that keeps my hair looking great with minimal effort. The key is to invest in great tools, learn a few go-to styles, and when all else fails…cover up your mistakes with cute hair accessories! Now that fall has officially begun, I’ve been getting back into plaid. And by “getting back into plaid” I mean that I’m stockpiling anything and everything with a plaid print. I’ve already bought plaid napkins, plaid button-downs, and plaid pillows, so naturally I couldn’t resist adding a few new plaid hair accessories to my collection! Today I thought I’d showcase my new plaid purchases and give away my three-day hair routine secrets. I’m sharing three easy fall hairstyles, and each look will help you create a polished look in under 10 minutes!How I Prep My Hair
Over the years I’ve learned that it’s best to keep things simple with my hair care routine. I start by cleansing and conditioning my hair with a moisturizing shampoo and conditioner (current favorites are Nexxus and ), and then I apply a spritz of and a dab of abefore blow-drying my hair. Once my hair is completely dry, I’ll spray anover my entire head and brush it out with my trusty . This simple routine keeps my hair soft and smooth, and the small amount of styling products give my hair the perfect texture for holding curls!Day 1: Loose Waves

STEP 1: CURL YOUR HAIR
If you want to create loose waves that last all day long, it’s important to invest in a good curling iron. I prefer ceramic curling irons with a 1- to 1.5-inch wand that have an option to control the temperature to prevent excess hair damage. The is my latest purchase, and it has quickly become a favorite. This curling iron couldn’t be easier to use. Simply take a 1- to 2-inch section of hair, clamp the ends of your hair in the curling iron, and press the curling button. The curling iron rotates your hair into the perfect position for curling, and it has the option to curl in two directions (away from or toward your face). I’ve used automatic curlers before, but this bad boy definitely wins first place. It has quite a few tech features that I love, including a switch that controls the speed the curling iron moves (fast or slow), a digital temperature gauge, and a small clamp that keeps your hair in place without creating kinks in the curl! I create about 10 curls on each side of my head with the , and the process takes about five to seven minutes. This curling iron is really cool, and I’d recommend it for curling newbies and pros alike.STEP 2: SEPARATE YOUR CURLS
Once your curls are perfected, it’s time to separate them into soft and bouncy waves. Simply run your fingers through your hair until each curl is separated into several pieces. In just a few minutes, your curls will fall into dreamy loose waves!STEP 3: ACCESSORIZE YOUR STYLE
I’m crazy about plaid accessories this season, so I opted for a black-and-white . The finished look is perfectly preppy and Blair Waldorf-approved!Day 2: Simple, Bouncy Ponytail

STEP 1: VOLUMIZE YOUR HAIR (IF NEEDED)
If your hair deflates overnight, it’s easy to re-volumize it. I like to flip my head over and blow-dry my hair for about 30 seconds to one minute to create massive volume in my second-day hair!STEP 2: SECURE YOUR PONYTAIL
I think high ponytails are better at camouflaging dirty hair, so I like to secure my ponytail withat the crown of my head. Use your fingers to spread the base of your ponytail to create a fuller appearance!STEP 3: ACCESSORIZE YOUR STYLE
At this point, you’ve just created a slightly fancier version of a ponytail; however, adding a cute hair accessory can transform this look into an adorable fall style! I love the way thislooks with my ponytail, but a bow or headband would be equally darling!Day 3: Messy, Braided Topknot
STEP 1: VOLUMIZE YOUR HAIR (IF NEEDED)
If your hair is looking flat, simply blow-dry for 30 seconds to one minute like we did in day two. If your hair is starting to look a little oily, no worries! Simply spritzat your roots before beginning your topknot.STEP 2: SECURE YOUR PONYTAIL AND CREATE BRAID
Use a plaid hair elastic to secure your hair into a high ponytail at the crown of your head. For this relaxed look, you don’t want your ponytail to be too tight. Once the hair is tied, loosen up the ponytail to create extra volume around the sides of your head. In step 4, we’ll be wrapping a braid around the base of the topknot. If you have thick hair, simply separate one section of your ponytail and create a simple braid. Secure the braid with a bobby pin until your topknot is finished. If you have thin hair like me, I recommend using hair extensions for this step. Simply braid one weft of your hair extensions and set it aside until your topknot is finished.STEP 3: CREATE A MESSY TOPKNOT
Use a hairbrush to tease your ponytail. Don’t worry if your hair becomes messy and tangled. We’re looking for volume – not silky hair. Once your ponytail is thoroughly teased and fluffy, grab the end and twist several times. Then, wrap your twisted ponytail around the base of your ponytail. Use bobby pins to secure the bun and flatten it against your head. This hairstyle actually looks better when it’s messy, so don’t worry too much about making a mistake!STEP 4: WRAP YOUR BRAID AROUND THE BUN
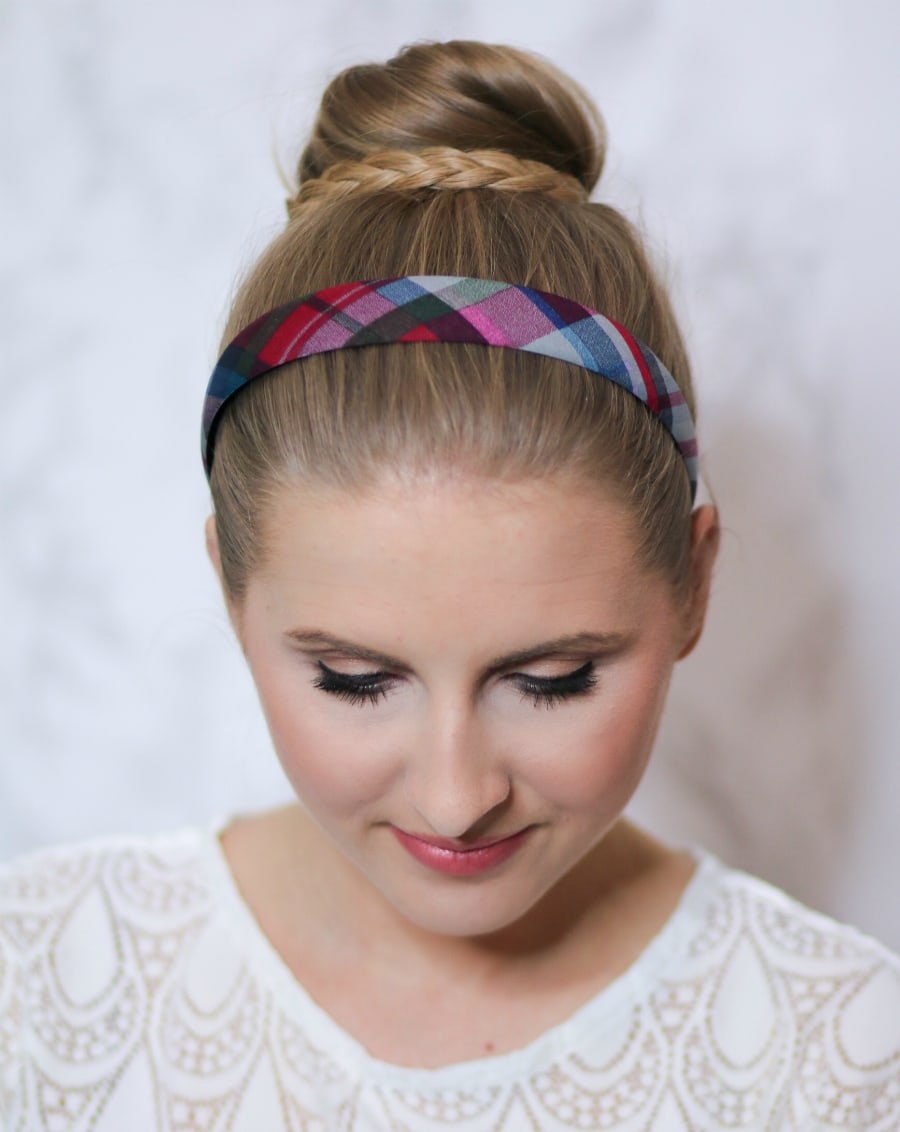
Once your messy topknot is secured, loosely wrap your braid around the base of your bun and secure it with a bobby pin!STEP 5: ACCESSORIZE YOUR STYLE
While this hairstyle is beautiful on its own, a gives the look a holiday flair. Plus, this hair accessory is a great way to camouflage dirty third-day roots! Now that you’ve learned all of my fall hair secrets, head to Target to pick up a few new hair products for fall! They sell all of the products mentioned in this post, and they have the cutest selection of plaid hair accessories. Whether you need a new shampoo or a fun new headband, the beauty section of Target is the place to go!What’s your go-to hairstyle for fall?
Find your style @TargetStyle